All about Kiteboarding and Kitesurfing from beginners to guru's

Wednesday, July 12, 2006

equipment you'll need

Lets discuss the equipment you will need. and some of the terms of the sport.
Not too much just the basics.

1. Kite,
There are tonns of differetn kites out there, for the basics we will stick to the more usre friendly.
Inflatables.
for a photo see
http://www.extremesportsworld.co.uk/product.asp?productID=800

2. bar
the thing your steer with.
for a photo see http://www.extremesportsworld.co.uk/product.asp?productID=797

3. harness
the thing that goes around your body
http://gorptravel.away.com/nissan/microsite_04/kiteboarding/gear_3.html

4. lines,
these are the things that hold you to the kite.
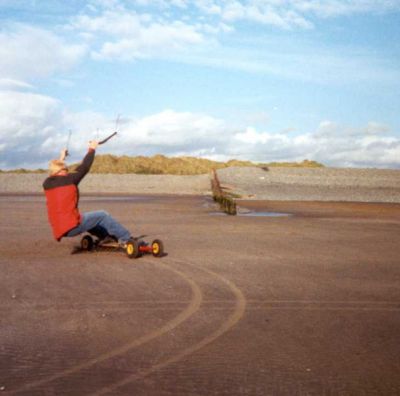
5. board
best to start with a twin tip.
they are easy to start with and 90% of kiters use them world wide.
there are two main types, bi directional and directions.
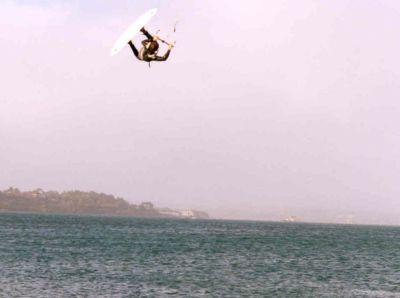
usually bi directional are great for jumps etc and for peole from a nowboarding type background
http://www.laureleastman.com/boards_for_rent_cabarete.html
directional boards are more like a wind surfer board, great for speed, but not as flexible in the air.
http://www.ikiteboarding.com/kiteboarding/articles/choosing-a-kiteboard.aspx
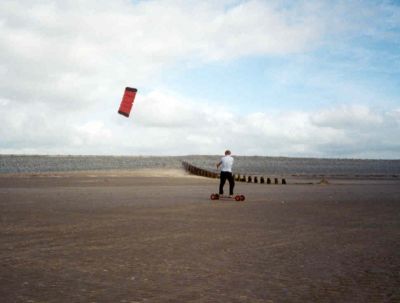

6. Wind window.
It is a little hard to explain. Basically with the wind at your back you have an arc around you at about 85degrees in which the kite will fly.
This is the wind window.
Check it out full here, there are some great pictures
http://www.chicagokitesurfing.com/inflatabletips.html


You can check a heap more out here,, lots more pics and a deeper description.
http://kitesurfingschool.org/equipments.htm

Glenn

controlling kite power

Controlling the Kite power


In order to kiteboard you need to be able to control the kite power.
The the technical people, lift = project kite surface x wind speed squared.
What that means, the power is controlled by the project kite surface.
You need to know how to control the kite to change it projected surface .
Two ways.
1.projected surface are controlling
basically traditional sailing method.
For 4 line inflatable kites, you can change the projected area by depowering, wich changes the attack angle of the kite. Practice this by going back and forth with the kite and adjusting the power, via the “chciken loop”. It is a good idea to get the feel of this.
One of the beauties about this is you can lock the power of the kite. In high winds you can lower the kites power and still feel in control.

2.Speed controlling
pretty obvious, control the power of the kite by it's speed. The faster the kite is going the more power it produces.
When the kite flys across the wind window, can can produce as much as 10 times the power. How do you do it
set your kite up so it generates enough pull to sail when the wind is at the TOP end of the wind condition condition.
Sail the kite across the wind window, in medium winds, use a sine wave pattern between 30-60 degrees, if the winds are light use a big sine wave pattern 10-70 degrees.

Learn both methods, it is good to know both for safety

starting kiteboarding the launch

This is the start of a basic 20 step guide to Kiteboarding.

We will try and cover everything you need to know.

Step 1, is you have to be able to pilot the Kite in order to be a successful boarder.
The beauty about this is you can do it out of season and get some great practice in.

Most kites are different, we suggest you get a basic trainer kite, inflatable.
One that will allow you to practice launching on, in water as well as on land.

We are only going over the traditional inflatable here for now.
Launching Inflatable on land or snow,

wait for a steady 8 knot (or there abouts) wind, use 10-20M less line while practicing on land.

1. Place the kite down on sand, with leading edge toward the wind, with one tip of the kite on the sand and the other tip in the air. The kite looks like "C", leading edge facing the wind.
2. Fold the kite tip (about a foot 30cm or so)and put enough sand on it to stop it from moving.
3. Grab control bar, position yourself with the kite at the wind window edge respective to you (kite is 85 degrees to left or right of you leading edge facing the wind).
4. For a 4 line inflatable, adjust the trim strap and put the kite in depowered mode.
5. Attach safety leash wrist or harness. Don't hook in or shackle until after launching kite.
6. Pull on the control bar of the line nearest to the ground(the side that has sand on it) this will unfold the tip, release the kite.
7. Pull the top line (the one at the top of the kite) to make the kite go up.

Landing Inflatable on Land:
1. If you are hooked in to the chicken loop, UNHOOK before getting into shallow water near land, adjust the trim strap, put your kite in depowered mode.
2. Move the kite to the edge of the wind window near the ground (if safety leash is attached on the left of the kite then move the kite to the right wind window edge; or vice vresa)
3. Drop the bar, quickly pull in around 2 or 3 m of safety leash.
4. The kite should drop on the ground (leading edge on ground, the wind to your back, the wind will secure the kite on land)
5. Grab the safety leash line, walk toward kite, secure with sand.

Steering
Turn the kite simply by pulling on the left side of the bar, turns left.
pulling on the right side bar turns right.

some practice ideas
go left, go right.
figure 8 in left half, figure 8 in right half
do some up and down (sine) moves across wind window

do above while runnign left and right.

make the kite hover at either end of the wind window while running left and right, with kite at 45degree angele

lie on the ground, with kite hovering at the zenith or top.
dive the kite either left or right to lift you off the ground.
and do reverse.

also practice with the dead man safety devices
and maybe on lighter days, use the harness and try controlling the kite with 1 hand.

That should get you started.

Stay tuned for next time.

Getting into the water

Great little description about getting into the water.


Now you are ready to learn how to kitesurf.
The best wind to practice in is 10 to 18 knots using the kite size appropriated to your weight. Different kites generate different power. Your kite vendor should be able to provide you with a table describing which kite to use in a certain wind speed.
When the kite is straight above your head, you should feel that the kite is lifting a small portion of your weight.
If the kite is not lifting you up at all, you need a bigger kite.
If the kite is lifting you up off your feet occasionally, you need a smaller kite.


Get yourself ready in the water using the following steps (this method is written for a right-handed person – with the safety leash attached to the left wrist (or harness) and the board leash (if you haven't yet know how to body drag upwind and still use board leash) attached to the right side of your harness; reverse the left/right designation for a left-handed person):


1. Launch the kite (some may prefer to do this in step 4) with the safety release line attached to your left wrist or harness.


2. Walk into the waist-deep water.


3. This step is not necessary if you already know how to body-drag upwind. Attach the board leash to your harness (make sure you have a helmet if you use board leash). Your harness is the best place to attach the board leash . Attach a metal ring permanently to your harness. At the end of your board leash attach some large marine carabineer which you can easily attach or detach the board leash from the metal ring on your harness.


4. Launch your kite if you have not done so in step 1 (this is only possible with an inflatable)


5. Use the kite power to drag you to deeper water (this step may not be necessary if you have plenty of space).


How To KiteSurf


Technorati Tags: , ,

30000 members by the end of the year

Looks like people are catchign on. 

Press Release - Kite Surfing Association Working to Build Awareness And Business
Kite Surfing Association Working to Build Awareness And Business

/24-7PressRelease/ - FORT LAUDERDALE, FL, July 12, 2006 - The dramatic interest in the athletically demanding sport of kite surfing has given AKSA founders encouragement about the value of their newly founded organization.

AKSA is a trade association directed at marketing the sport to untapped audiences in order to dramatically grow interest in the kite surfing arena. AKSA is offering a three month to multi-year PR and Marketing outreach program exclusively tailored to the fast-growing kite surfing audience. This dynamic, unique, and proven program consistently and constantly creates a corporate presence, product presence, leadership presence, web presence, and provides regular feature media coverage. This program is ideal for all kite surfing and related companies with new and existing product announcements, industry positioning, and long-term growth strategies. Lead generation and web traffic is a quantifiable result of this program. This program was developed by TR Cutler, Inc., (www.trcutlerinc.com) one of the most well-respected and significant public relations firms. Co-founder of AKSA, Logan Long stated, "A program like this is a must for any business looking to grow. The days of expos and mass mailings to build product awareness are a thing of the past. The internet is the new medium of information for consumers."

American Kite Surfing Association (AKSA) is the leading organization for kite surfers in North America. Founded in 2006 by two extreme sport enthusiasts, membership is anticipated to exceed 30,000 before the end of the year. The purpose of the enterprise is to bring heightened awareness to this fast-growing, dynamic, and fun sport. A vast array of information, products, and techniques are available to the visitors of the AKSA website, www.kite-surfingusa.com. After more than a decade of popularity through Europe and Australia, active North American extreme sport athletes are recognizing the maximum adrenaline rush through kite surfing.

Cathi Long
Executive VP
American Kite Surfing Association
Info@kite-surfingusa.com
727-772-1202


Technorati Tags: , ,

Global warming and Kiteboarding

Click to view full size imageClick to view full size image


Windsurf, Kitesurf and Surf Photo Gallery - Land-based kiting/tailslide

Technorati Tags: ,

GREAT AIR


Click to view full size image

Windsurf, Kitesurf and Surf Photo Gallery - Kitesurfing/intheair

Technorati Tags: ,

great images.

Not sure if this will blog correctly,  but check out these great photo's.
Click to view full size image

Windsurf, Kitesurf and Surf Photo Gallery - Kitesurfing/Kitesurfing action on earnse bay

or a really cool multi image oneClick to view full size image

Thanks to the guys at forces-of-nature.co.uk.  they have some other great photo's as well.


Technorati Tags: , ,

New safety equipment

Hey some safety equipment from http://www.oceanustech.com.


Sounds interesting, if anyone has had aplay let me know about it.

Kiteboarding Safety Products by Oceanus Technologies
Oceanus Technologies has three products being offered to kiteboarders that help increase safety when kiteboarding:

- THE STANDARD REEL LEASH
The Standard REEL Leash is our first and most widely distributed KITE BOARD LEASH. All Oceanus REELs are strong, lightweight retractable devices adapted to a saltwater environment. To date we supply our REELs to distributors, dealers, and schools in 20+ countries. Our REEL leash comes with a seven-inch long shock cord to aid in absorbing the initial pull on a fall.

- THE REEL ReENFORCED
The REEL ReEnforced is our heavy-duty model. This model is the most durable, reliable, longest lasting unit to date. We highly recommend this Heavy Duty model to all kiters and is the model we suggest be used anywhere increased board loss is a factor such as the open ocean, or rivers with strong current.

- THE EEL **NEW**
The EEL is our latest and very popular model. While starting out as our medium duty model the EEL is very rapidly becoming our second heavy-duty model. The EEL offers several forward thinking modifications in one affordable package.

The EEL has been reinforced from within, providing a strengthened and seamless feed port. While remaining very similar in size and weight to our Standard REEL the EEL has many of the strength features of our REEL ReEnforced model.

Our EEL comes standard with our new rope extension. This allows another 3 feet between the rider and his board on a fall. It also keeps the unit in the relaxed position while riding, which extends the life of the unit. Our rope extension has a flat webbing connector that attaches to a binding post or fin screw on the deck of the board.

The EEL, like all of our REELs, is designed to perform out of the water and out of the way. The kiter will barely be aware that they are using it. THE EEL will also not slingshot the board back at you on a fall like stretch cords do. As on all REELs, we use a flat nylon webbing leash strap, not synthetic rubber.

Came from prnewsnow.com, thanks Cathi long


Technorati Tags: , , ,